
프로젝트 생성 + 설정
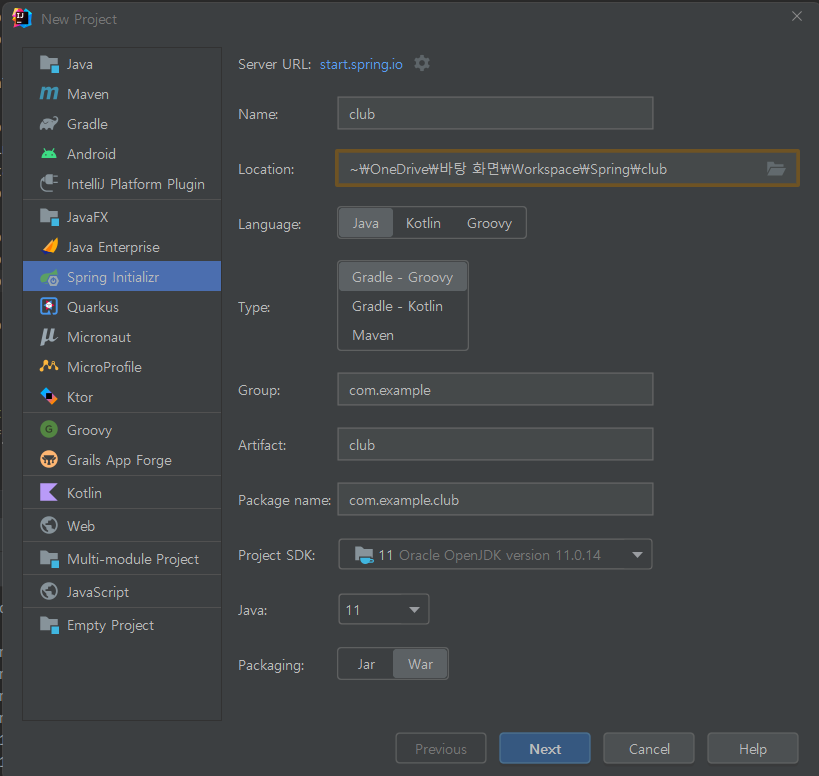
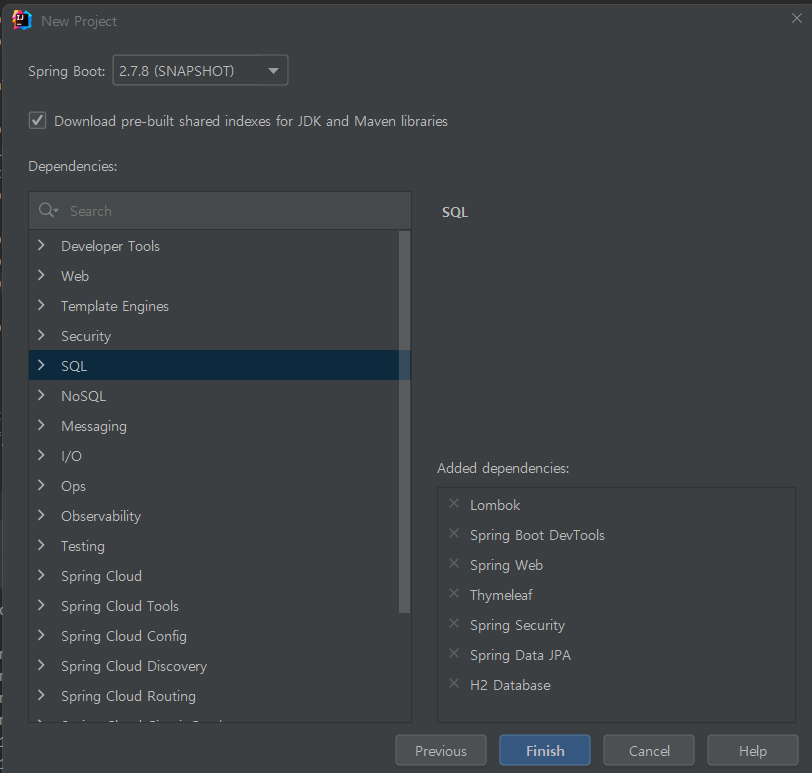
Spring Security를 적용시킬 새 프로젝트 club을 다음과 같이 생성하고, build.gradle, application.yml 설정을 다음과 같이 작성해줘야한다.
plugins {
    id 'org.springframework.boot' version '2.7.5'
    id 'io.spring.dependency-management' version '1.0.15.RELEASE'
    id 'java'
    id 'war'
}

group = 'com.example'
version = '0.0.1-SNAPSHOT'
sourceCompatibility = '11'

configurations {
    compileOnly {
        extendsFrom annotationProcessor
    }
}

repositories {
    mavenCentral()
}

dependencies {
    implementation 'org.springframework.boot:spring-boot-starter-thymeleaf'
    implementation 'org.springframework.boot:spring-boot-starter-web'
    compileOnly 'org.projectlombok:lombok'
    developmentOnly 'org.springframework.boot:spring-boot-devtools'
    runtimeOnly 'com.h2database:h2'
    annotationProcessor 'org.projectlombok:lombok'
    providedRuntime 'org.springframework.boot:spring-boot-starter-tomcat'
    testImplementation 'org.springframework.boot:spring-boot-starter-test'
    implementation 'org.springframework.boot:spring-boot-starter-data-jpa'

    implementation 'com.github.gavlyukovskiy:p6spy-spring-boot-starter:1.5.8'
    implementation group: 'org.thymeleaf.extras', name: 'thymeleaf-extras-springsecurity5'
    implementation group: 'org.thymeleaf.extras', name: 'thymeleaf-extras-java8time'

    implementation 'org.springframework.boot:spring-boot-starter-security'

}

tasks.named('test') {
    useJUnitPlatform()
}
server:
  port: 8080
  servlet:
    context-path: /
    encoding:
      charset: UTF-8
      enabled: true
      force: true

spring:
  datasource:
    driver-class-name: org.h2.Driver
    url: jdbc:h2:tcp://localhost/~/club
    username: sa
    password:
  servlet:
    multipart:
      enabled: true
      location: C:\\upload
      max-request-size: 30MB
      max-file-size: 10MB
  security:
    debug: true

  jpa:
    properties:
      hibernate:
        format_sql: true
    hibernate:
      ddl-auto: none #create update none
      naming:
        physical-strategy: org.hibernate.boot.model.naming.PhysicalNamingStrategyStandardImpl
    show-sql: true

logging:
  level:
    "[org.springframework.security]": DEBUG
위와 같이 security dependency를 추가해주고 프로젝트를 실행하고 localhost:8080/login 접속 시, 아래와 같이 login form이 나오는 것을 확인할 수 있다.
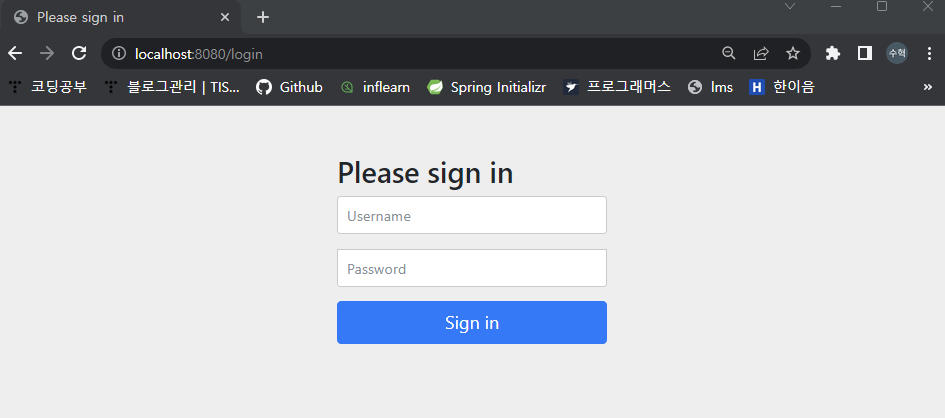
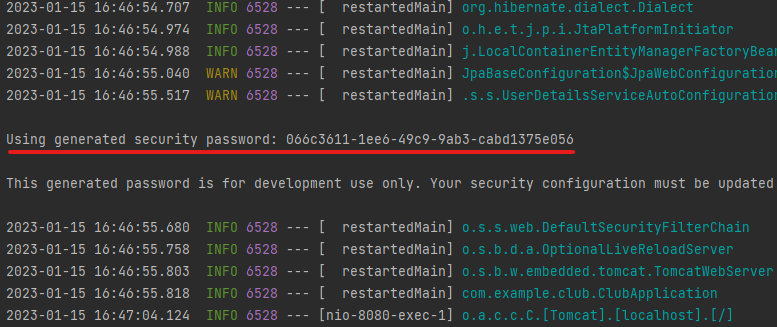
위처럼 프로젝트 실행시 콘솔창에 security password가 나오는것을 확인할 수 있다. 자동 생성된 임시 패스워드이다.
생성된 패스워드는 기본으로 사용해볼 수 있는 'user' 계정의 패스워드이다. 프로젝트 초기에 아무 계정도 없을 때 사용할 수 있는 임시 패스워드 역할을 한다. 위의 login form에서 아이디 'user' 패스워드는 위의 자동생성 패스워드 입력 시 로그인이 되는 것을 확인할 수 있다. 만약 아이디나 패스워드를 다르게 입력 시, 로그인 되지 않고 '자격 증명에 실패하였습니다'라고 출력되는 것도 확인할 수 있다.
Security 설정 클래스 작성 (SecurityConfig Class)
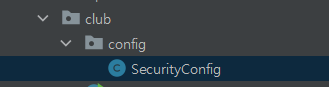
club하위에 config 디렉토리 생성 후, SecurityConfig 클래스를 생성해준다.
기존의 스프링버전과 달리 현재는 스프링 버전이 업데이트 됨에 따라 WebSecurityConfigurerAdapter와 그 몇가지들이 Deprecated 됐다. 현재는 해당 Adapter를 상속받아 override하는 방식에서 -> Bean으로 등록하는 것으로 바뀌었다.
하지만, 책을 이용한 원활한 공부를 위해 변경 전 방식으로 실습을 진행하도록 하겠다.
변경 전
package com.example.club.config;

import lombok.extern.log4j.Log4j2;
import org.springframework.context.annotation.Configuration;
import org.springframework.security.config.annotation.web.configuration.WebSecurityConfigurerAdapter;

@Configuration
@Log4j2
public class SecurityConfig extends WebSecurityConfigurerAdapter{
}
변경 후
package com.example.club.config;

import lombok.extern.log4j.Log4j2;
import org.springframework.context.annotation.Configuration;
import org.springframework.security.config.annotation.web.configuration.EnableWebSecurity;

@Configuration
@EnableWebSecurity
@Log4j2
public class SecurityConfig{
}
현재 SecurityConfig에는 별다른 코드를 작성해주진 않았지만, 추후에는 모든 Security 관련 설정이 추가되는 클래스이다.
SampleController
Security와 관련된 설정이 정상적으로 동작하는지를 확인하기 위해서 SampleController를 구성하고 테스트해볼 것이다.
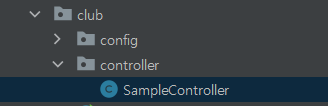
controller 디렉토리 생성 후, 하위에 SampleController 클래스를 추가해준다.
SampleController 클래스에는 현재 로그인한 사용자의 권한에 따라 접근할 수 있는 경로를 지정해준다.
- 로그인을 하지 않은 사용자도 접근할 수 있는 '/sample/all'
- 로그인한 사용자만이 접근할 수 있는 '/sample/member'
- 로그인한 사용자 중 관리자(admin) 권한이 있는 사용자만이 접근할 수 있는 '/sample/admin'
package com.example.club.controller;

import lombok.extern.log4j.Log4j2;
import org.springframework.stereotype.Controller;
import org.springframework.web.bind.annotation.GetMapping;
import org.springframework.web.bind.annotation.RequestMapping;

@Controller
@Log4j2
@RequestMapping("/sample/")
public class SampleController {

    @GetMapping("/all")
    public void exAll() {
        log.info("exAll................");
    }

    @GetMapping("/member")
    public void exMember() {
        log.info("exMember...............");
    }

    @GetMapping("/admin")
    public void exAdmin() {
        log.info("exAdmin...............");
    }
}
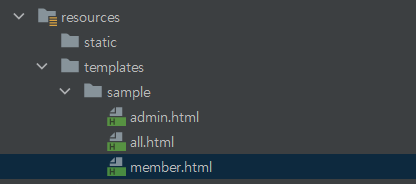
앞서 설정한 것처럼 작동하는지 확인하기 위해서, resources 폴더에 sample 디렉토리 생성 후, admin, all, member html 파일들을 생성해준 후 각각의 페이지를 확인할 수 있도록 간단하게 코드를 작성한다.
<!DOCTYPE html>
<html lang="en">
<head>
    <meta charset="UTF-8">
    <title>Title</title>
</head>
<body>
    <h1>Admin</h1>
</body>
</html>
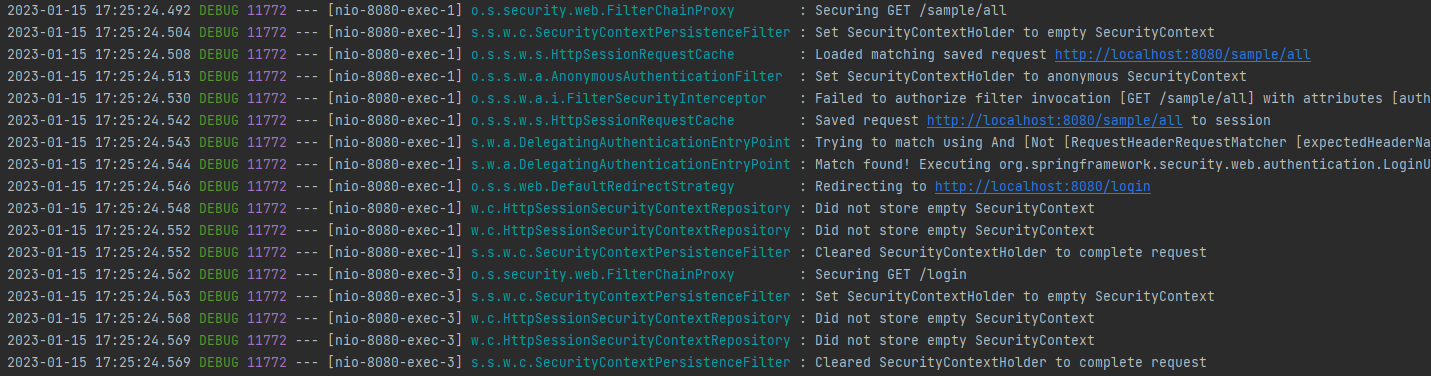
application.yml에서 security debug를 설정해놓았기 때문에,
localhost:8080/sample/all로 접속 시, 시큐리티로 인해 내부적으로 여러개의 필터를 거친 후, 로그인 화면이 보이는 것을 확인할 수 있다.
Security 용어 + 흐름
[개념] Spring Security 란 무엇인가?
Spring Security란? Spring 기반의 애플리케이션의 보안(인증, 권한, 인가)을 담당하는 스프링 하위 프레임워크이다. Spring Security는 인증(Authentication), 권한(Authorization)에 대한 부분을 Filter의 흐름에 따
soohykeee.tistory.com
Spring Security의 동작에는 여러 개의 객체가 서로 주고 데이터를 주고받으며 이루어진다. 기본 구조는 아래와 같다.
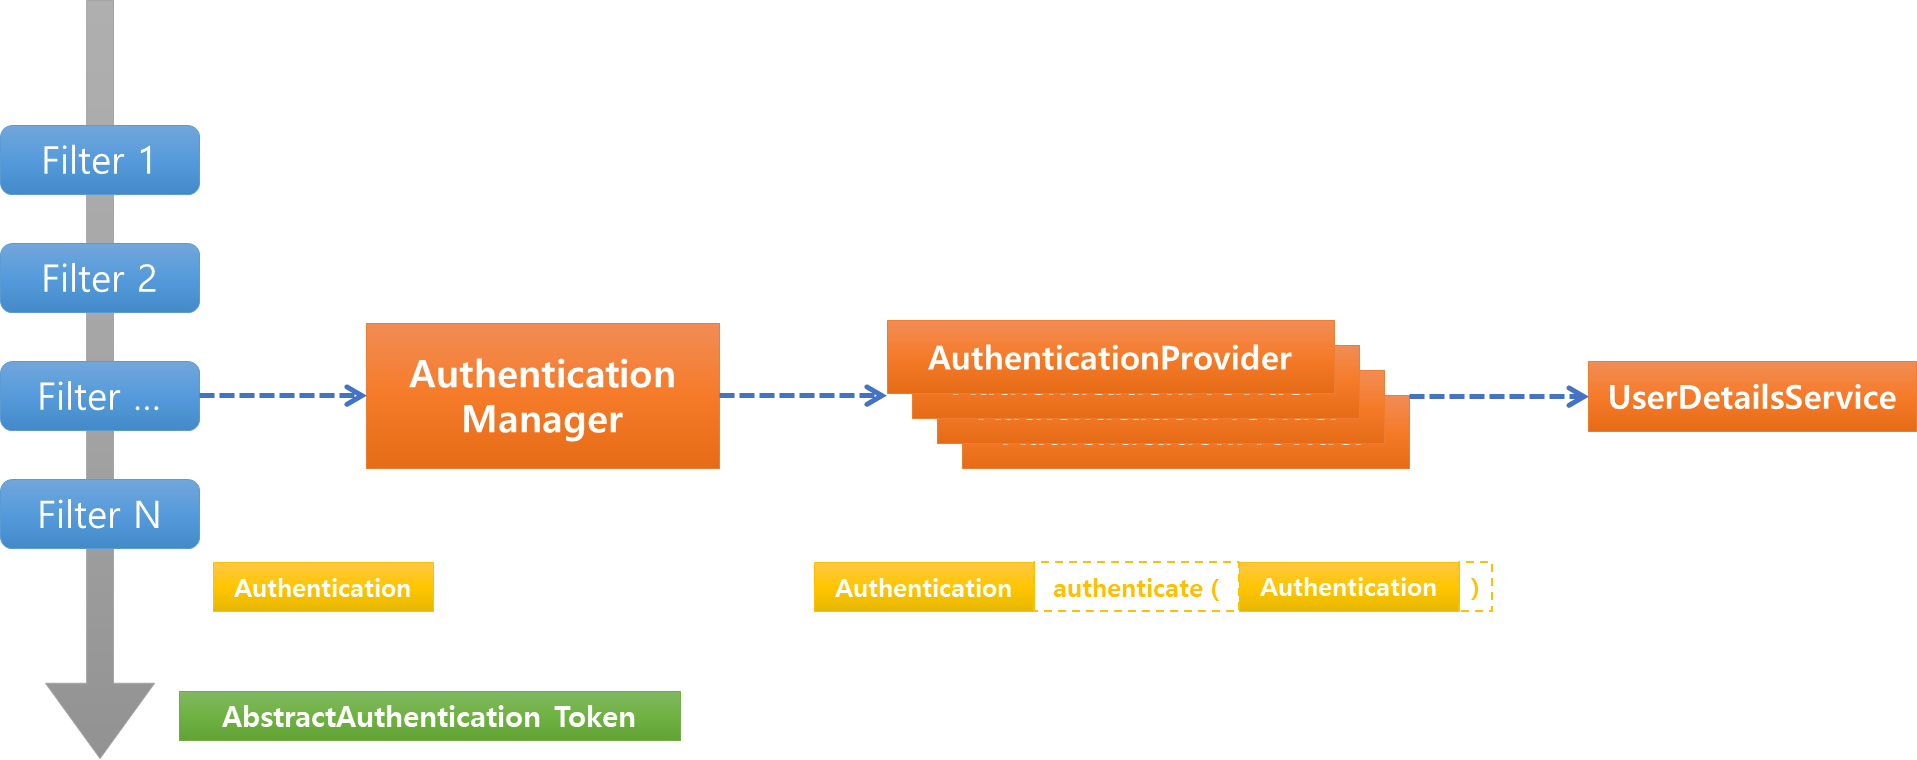
핵심 역할은 Authentication Manager(인증 매니저)를 통해서 이루어진다. Authentication Provider는 인증 매니저가 어떻게 동작해야 하는지를 결정하고, 최종적으로 실제 인증은 UserDetailsService에 의해 이루어진다.
Spring Security를 관통하는 가장 핵심 개념은 인증(Authentication)과 인가(Authorization)이다. 해당 개념을 이해하는 것은 실제 오프라인에서 이루어지는 행위와 유사하다. 간단한 예를 들어 설명하자면, 만약 은행에 금고가 하나 있고, 사용자가 금고의 내용을 열어본다고 가정해보면 다음과 같은 과정을 거치게 된다.
- 사용자는 은행에 가서 자신이 어떤 사람인지 자신의 신분증으로 자신을 증명한다.
- 은행에서는 사용자의 신분을 확인한다.
- 은행에서 사용자가 금고를 열어 볼 수 있는 사람인지를 판단한다.
- 만일 적절한 권한이 있는 사용자의 경우 금고를 열어준다.
위 과정에서 1에 해당하는 것이 인증(Authentication)에 해당하는 작업으로, 자신을 증명하는 행위이다. 3에 해당하는 것은 인가(Authorization)에 해당하는 작업으로, 일종의 허가를 해주는 과정이다.
Filter와 Filter chain
[개념] Spring Security Filter
Spring Security 란 무엇인가? [개념] Spring Security 란 무엇인가? Spring Security란? Spring 기반의 애플리케이션의 보안(인증, 권한, 인가)을 담당하는 스프링 하위 프레임워크이다. Spring Security는 인증(Authent
soohykeee.tistory.com
Spring Security에서 Filter는 Servlet이나 JSP에서 사용하는 Filter와 같은 개념이다.
다만, Spring Security에서는 Spring의 Bean과 연동할 수 있는 구조로 설계되어 있다. 일반적인 Filter는 Bean을 사용할 수 없기에 별도의 클래스를 상속받는 형태가 많다. 즉, 일반적으로 Filter에는 Bean을 연동할 수 없지만, Security에서는 가능하다.
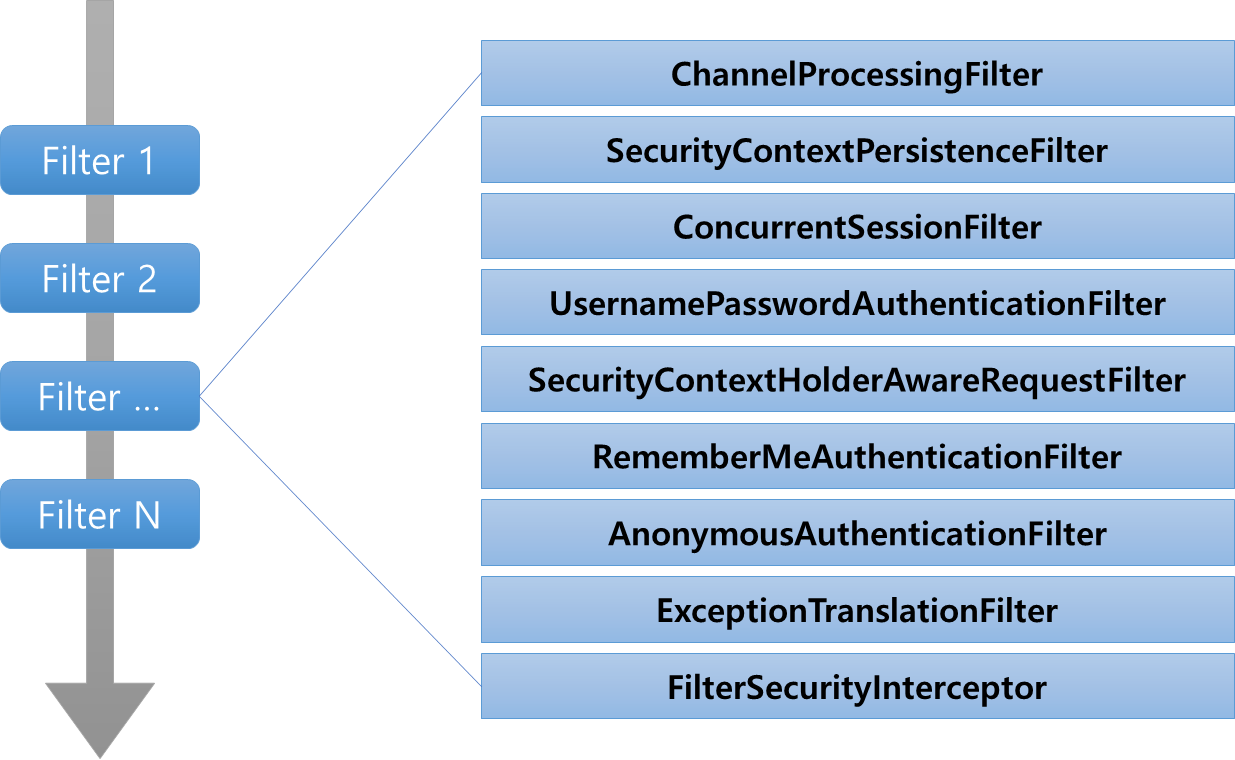
Spring Security의 내부에는 여러개의 Filter가 Filter Chain 이라는 구조로 Request를 처리하게 된다. 앞서 '/sample/all'로 접속 시, 실행되었던 로그를 살펴보면 여러개의 필터가 동작하는 것을 확인할 수 있었다. 개발 시 Filter를 확장하고 설정하면 Spring Security를 이용해서 다양한 형태의 로그인 처리가 가능하다.
실제 Spring Security에서 사용하는 주요 Filter는 아래와 같다.
인증을 위한 AuthenticationManager
Filter의 핵심적인 동작은 AuthenticationManager를 통해서 인증(Authentication) 타입의 객체로 작업을 하게 된다. AuthenticationManager가 가진 인증 처리 메서드는 파라미터와 리턴타입 모두 Authentication 타입이다.
로그인하는 과정에서 사용자의 아이디, 패스워드를 통해 자신이 어떤 사람인지 전달한다. 전달된 아이디, 패스워드로 실제 사용자에 대해 검증하는 행위는 AuthenticationManager를 통해 이루어진다.
실제 동작에서 전달되는 파라미터는 UsernamePasswordAuthenticationToken과 같이 Token이라는 이름으로 전달이 된다. 이는 Spring Security Filter의 주요 역할이 인증 관련된 정보를 Token 이라는 객체로 만들어서 전달하는 것을 의미한다.
아래에 작성한 코드는 UsernamePasswordAuthenticationFilter 클래스 코드 중 일부이다.
String username = obtainUsername(request);
username = (username != null) ? username : "";
username = username.trim();
String password = obtainPassword(request);
password = (password != null) ? password : "";
UsernamePasswordAuthenticationToken authRequest = new UsernamePasswordAuthenticationToken(username, password);

//Allow subclasses to set the "details" property
setDetails(request, authRequest);
return this.getAuthenticationManager().authenticate(authRequest);
위 코드의 내용을 보면, request를 이용해서 사용자의 아이디와 패스워드를 받아서 UsernamePasswordAuthenticationToken이라는 객체를 생성 후, 이를 AuthenticationManager의 authenticate()에 파라미터로 전달하는 것을 볼 수 있다. AuthenticationManager는 다양한 방식으로 인증처리 방법을 제공해야한다.
- DB를 이용할 것인지
- 메모리상에 있는 정보를 활용할 것인지
위와 같은 방법을 제공할 수 있고, AuthenticationManager는 이러한 처리를 AuthenticationProvider로 한다.
AuthenticationProvider는 전달되는 토큰의 타입을 처리할 수 있는 존재인지를 확인하고, 이를 통해서 authenticate()를 수행하게 된다. 그렇기에 다양한 인증처리를 할 수 있는 객체들을 가지는 구조이다.
또한 내부적으로 UserDetailsService를 이용한다. UserDetailsService는 실제로 인증을 위한 데이터를 가져오는 역할을 하는데, 예를 들어 JPA로 Repository를 만들었다면, UserDetailsService를 활용해서 사용자의 인증 정보를 처리한다.
인가(Authorization)와 권한 / 접근 제한
인증(Authentication)처리 단계가 끝나면, 다음으로 동작하는 부분은 '사용자의 권한이 적절한가?'에 대한 처리이다. 인가(Authorization)은 '승인'의 의미이다.
Filter에서 호출하는 AuthenticationManager에는 authenticate()라는 메서드가 있는데, 이 메서드의 reutrn 값은 Authentication이라는 '인증' 정보이다. 해당 정보 내에는 Roles라는 '권한'에 대한 정보가 포함되어 있다. 이 정보를 이용하여 사용자가 원하는 작업을 할 수 있는지 '허가'하게 되는데, 이러한 행위를 'Access-Control(접근 제한)' 이라고 한다. 일반적인 경우라면 설정으로 원하는 목적지에 접근 제한을 걸고, Spring Security에 이에 맞는 인증을 처리한다.
앞서 설명한 과정을 실제 결과에 투영하여 보면 아래와 같은 구동순서이다.
- 사용자는 원하는 URL을 입력한다.
- Spring Security에서는 Authentication / Authorization이 필요하다고 판단하고(Filter 에서 판단) 사용자가 인증하도록 로그인 화면을 보여준다.
- 사용자는 스스로를 인증하기 위해 'user' 라는 계정에 대한 정보를 입력하고, 이떄 패스워드는 프로젝트 실행 시 자동생성된 패스워드를 입력한다. - 정보가 전달된다면 AuthenticationManager가 적절한 AuthenticationProvider를 찾아서 인증을 시도한다.
- AuthenticationProvider의 실제 동작은 UserDetailsService를 구현한 객체로 처리한다. 만일 올바른 사용자라고 인증되면 사용자의 정보를 Authentication 타입으로 전달한다. 전달된 객체로 사용자가 적절한 권한이 있는지 확인하는 인가(Authorization) 과정을 거치게 된다. 이때 문제가 없다면 정상적인 화면을 볼 수 있게 된다.