
Spring Security 연동 (6) (소셜 로그인 처리 - ②)
Spring Security 연동 (6) (소셜 로그인 처리 - ②)
Spring Security 연동 (5) (소셜 로그인 처리 - ①) Spring Security 연동 (5) (소셜 로그인 처리 - ①) Spring Security 연동 (4) (UserDetailsService, DTO, Controller) Spring Security 연동 (4) (UserDetailsService, DTO, Controller) Spring S
soohykeee.tistory.com
소셜 로그인 후 처리
앞서 했던 구글 소셜 로그인을 진행하면, 자동으로 회원가입이 된다. 이처럼 자동으로 회원가입이 되는 경우 고려해야할 점들이 존재한다.
- 현재 패스워드를 모두 '1111'로 처리하는 점
- 사용자의 email 외에도 이름을 닉네임처럼 사용할 수 없다는 점
현재 fromSocial이라는 속성을 통해 구분지어 로그인이 가능하도록 설정하긴 했지만, 소셜 로그인을 통해 자동 회원가입된 회원도 자신의 회원정보를 수정할 수 있는 페이지가 필요하다.
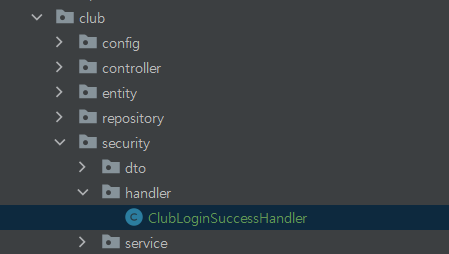
Spring Security의 로그인 처리 관련에는 AuthenticationSuccessHandler, AuthenticationFailureHandler라는 인터페이스를 제공한다. 이름에서 보이듯이, 인증 성공과 실패 후 처리하는 용도로 사용된다. HttpSecurity에서 이 Handler를 설정해줄 수 있다. 이를 위해 security 하위에 handler 디렉토리 생성 후, ClubLoginSuccessHandler 클래스를 추가해준다.
회원가입 성공일 때 사용할 handler이기에, AuthenticationSuccessHandler를 implements 해준다.
@Log4j2
public class ClubLoginSuccessHandler implements AuthenticationSuccessHandler {

    @Override
    public void onAuthenticationSuccess(HttpServletRequest request, HttpServletResponse response, Authentication authentication) throws IOException, ServletException {
        log.info("----------------------------------------");
        log.info("onAuthenticationSuccess");

    }
}
이제 해당 handler를 로그인에 성공했을 시 넘겨주기 위해서 SecurityConfig 클래스에서 수정이 필요하다.
@Configuration
@Log4j2
public class SecurityConfig extends WebSecurityConfigurerAdapter {

    @Bean
    PasswordEncoder passwordEncoder() {
        return new BCryptPasswordEncoder();
    }

    @Bean
    public ClubLoginSuccessHandler successHandler() {
        return new ClubLoginSuccessHandler();
    }

    @Override
    protected void configure(HttpSecurity http) throws Exception {
        http.authorizeRequests()
                .antMatchers("/sample/all").permitAll()
                .antMatchers("/sample/member").hasRole("USER")
                .antMatchers("/sample/admin").hasRole("ADMIN");

        http.formLogin();
        http.csrf().disable();

        http.oauth2Login().successHandler(successHandler());
    }
}
위와 같이 설정해 준 후, 'sample/member'에 접속 후 Google 로그인 진행 시 그전과 달리 아무런 화면이 출력되지 않고, ClubLoginSuccessHandler에 접근한것을 콘솔창으로 확인이 가능하다.

RedirectStrategy 를 이용한 처리
이전에 로그인 후, 자동으로 '/sample/member'로 redirect 되는 현상은 RedirectStrategy를 이용하여 처리했다. 이를 이용해서, 일반적인 로그인의 경우에는 동일하게 진행하고, 만약 소셜 로그인을 통해 회원가입이 되는 경우 회원 정보를 수정하는 경로로 이동하도록 구현해 줄 것이다.
예를들어, 구글 로그인을 통해 로그인 했을 때, 만일 패스워드가 '1111'인 경우라면 회원 정보를 수정하도록 Redirect 해줄 것이다.
@Log4j2
public class ClubLoginSuccessHandler implements AuthenticationSuccessHandler {

    private RedirectStrategy redirectStrategy = new DefaultRedirectStrategy();

    private PasswordEncoder passwordEncoder;

    public ClubLoginSuccessHandler(PasswordEncoder passwordEncoder) {
        this.passwordEncoder = passwordEncoder;
    }

    @Override
    public void onAuthenticationSuccess(HttpServletRequest request, HttpServletResponse response, Authentication authentication) throws IOException, ServletException {
        log.info("----------------------------------------");
        log.info("onAuthenticationSuccess");

        ClubAuthMemberDTO authMember = (ClubAuthMemberDTO) authentication.getPrincipal();

        boolean fromSocial = authMember.isFromSocial();
        log.info("Need Modify Member? " + fromSocial);

        boolean passwordResult = passwordEncoder.matches("1111", authMember.getPassword());

        if (fromSocial && passwordResult) {
            redirectStrategy.sendRedirect(request, response, "/member/modify?from=social");
        }

    }
}
ClubLoginSuccessHandler에 생성자를 작성해주었기에, SecurityConfig에도 수정이 필요하다.
    @Bean
    public ClubLoginSuccessHandler successHandler() {
        return new ClubLoginSuccessHandler(passwordEncoder());
    }
해당 코드만 작성 후, 실행하면 아직 modify.html을 작성해주지 않았기에 에러가 발생할 것이다. 우선 성공적으로 redirect되는 것을 보았으니 해당 html 파일은 추후에 작성해줄 것이다.
Remember Me, @PreAuthorize
[개념] Spring Security - Remember me 기능은 무엇인가?
Remember Me 란? JSESSIONID가 만료되거나 Cookie가 없어도 웹 브라우저가 종료된 이후에도 어플리케이션이 사용자를 기억하는 기능을 말한다. 쉽게 말해 자동 로그인 기능에 사용하는 것이다. * JSESSIONID
soohykeee.tistory.com
Security에서 사용하는 편리한 기능 중 하나인 '자동 로그인' 이라고 불리는 Remember Me 는 최근 많이 사용된다. 위에 간단하게 정리해놓았지만, Remember Me는 웹의 인증 방식 중 쿠키를 사용하는 방식이다. 해당 기능을 활용하면 한번 로그인에 성공한 사용자가 브라우저를 닫은 후에 다시 서비스에 접속해도 별도의 로그인 절차 없이 로그인 처리가 되어있게 할수있다.
Remember Me 설정
Remember Me 기능을 추가해주는 것은 비교적 간단하다. SecurityConfig 클래스에서 Remember Me() 설정을 추가하고, 주입받은 UserDetailsService를 지정해주면 된다.
@Configuration
@Log4j2
public class SecurityConfig extends WebSecurityConfigurerAdapter {

    @Autowired
    private ClubUserDetailsService userDetailsService;

    @Bean
    PasswordEncoder passwordEncoder() {
        return new BCryptPasswordEncoder();
    }

    @Bean
    public ClubLoginSuccessHandler successHandler() {
        return new ClubLoginSuccessHandler(passwordEncoder());
    }

    @Override
    protected void configure(HttpSecurity http) throws Exception {
        http.authorizeRequests()
                .antMatchers("/sample/all").permitAll()
                .antMatchers("/sample/member").hasRole("USER")
                .antMatchers("/sample/admin").hasRole("ADMIN");

        http.formLogin();
        http.csrf().disable();
        http.logout();
        http.oauth2Login().successHandler(successHandler());
        http.rememberMe().tokenValiditySeconds(60 * 60 * 7).userDetailsService(userDetailsService);

    }

}
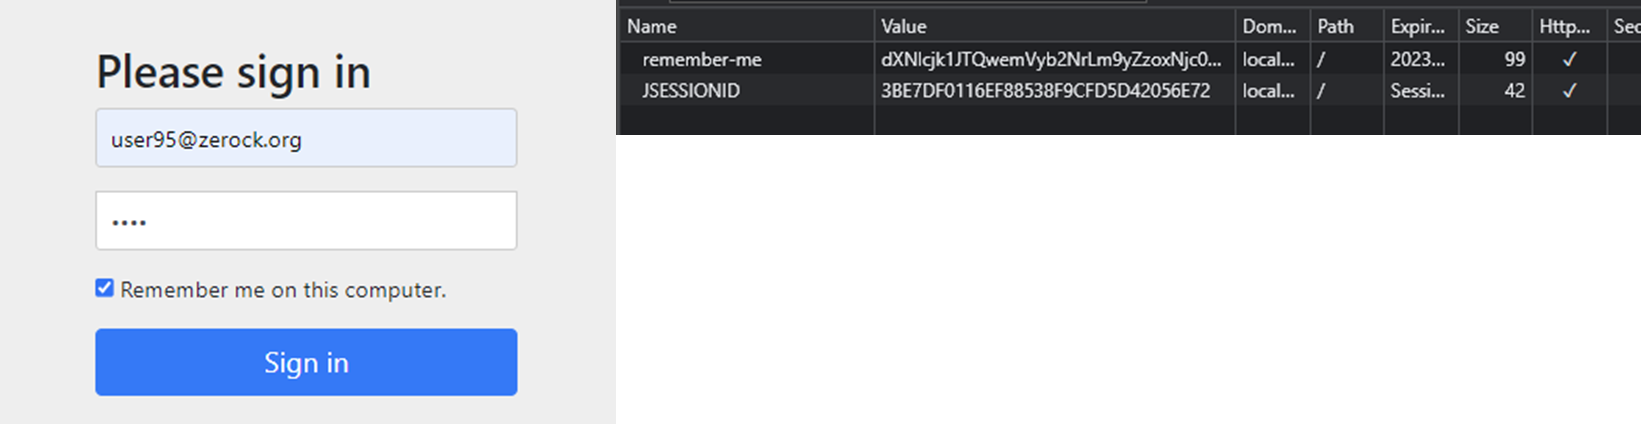
configure() 마지막 라인의 rememberMe()를 적용해줄 때, tokenValiditySeconds(~~~) 에 들어간 정보는 쿠키의 유효시간을 얼만큼 지정할 것인지 작성해주면 된다. 위처럼 60*60*7로 작성해주면 7일간 코드가 유지되도록 작성해준 것이다. 이처럼 rememberMe() 만 작성해주어도, 로그인 페이지에서 'Remember me on this computer' 라는 체크박스가 자동 생성되는 것을 확인할 수 있다.
또한 로그인 페이지에서 하단의 자동 로그인 기능의 체크박스를 클릭 후, 로그인을 성공한다면 하단에 보이는것처럼 remember-me라는 이름의 쿠키가 생성된것또한 확인할 수 있다.
소셜 로그인의 경우에는 적용되지 않는다.
@PreAuthorize
Spring 에서 SecurityConfig를 사용해서 지정된 URL에 접근 제한을 거는 방식도 좋지만, 매번 URL을 추가해줄 때 마다 이를 설정해주는 것은 번거롭다. 이를 해결하기 위해 나온것이 @PreAuthorize 어노테이션이다.
- @EnableGlobalMethodSecurity의 적용
- 접근 제한이 필요한 컨트롤러의 메서드에 @PreAuthorize 적용
@EnableGlobalMethodSecurity는 어노테이션 기반의 접근 제한을 설정할 수 있도록 하는 설정이다. 일반적으로 SecurityConfig와 같이 시큐리티 관련 설정 클래스에 붙이는 것이 일반적이다.
@Configuration
@Log4j2
@EnableGlobalMethodSecurity(prePostEnabled = true, securedEnabled = true)
public class SecurityConfig extends WebSecurityConfigurerAdapter {
	//... 생략
}
@EnableGlobalMethodSecurity 어노테이션은 여러 속성이 존재하지만, securedEnabled는 예전 버전의 @Secure 어노테이션이 사용 가능한지를 지정하고, @PreAuthorize를 이용하기 위해서는 prePostEnable 속성을 사용한다. @PreAuthorize() value로는 문자열로 된 표현식을 넣는다.
    @Override
    protected void configure(HttpSecurity http) throws Exception {
//        http.authorizeRequests()
//                .antMatchers("/sample/all").permitAll()
//                .antMatchers("/sample/member").hasRole("USER")
//                .antMatchers("/sample/admin").hasRole("ADMIN");

        http.formLogin();
        http.csrf().disable();
        http.logout();
        http.oauth2Login().successHandler(successHandler());
        http.rememberMe().tokenValiditySeconds(60 * 60 * 7).userDetailsService(userDetailsService);

    }
SecurityConfig에서 authorizeRequests를 주석처리하고, SampleController 클래스에서 해당 getMapping마다 @PreAuthorize 어노테이션을 활용하여 접근 권한을 해당에 작성해줄 수 있다.
@Controller
@Log4j2
@RequestMapping("/sample/")
public class SampleController {

    @GetMapping("/all")
    @PreAuthorize("permitAll()")
    public void exAll() {
        log.info("exAll................");
    }

    @GetMapping("/member")
    public void exMember(@AuthenticationPrincipal ClubAuthMemberDTO clubAuthMemberDTO) {
        log.info("exMember...............");

        log.info("-------------------------------");
        log.info(clubAuthMemberDTO);
    }

    @GetMapping("/admin")
    @PreAuthorize("hasRole('ADMIN')")
    public void exAdmin() {
        log.info("exAdmin...............");
    }
}